Roomba runs for only 10 minutes? Perform these 5 checks before replacing the battery
A robot vacuum that once cleaned the entire home may begin returning to its charging dock after a few minutes or fail to charge properly. A worn battery is one possible cause, but dirty contacts, hair around the brushes, a blocked caster wheel or an incorrectly fitted battery can produce similar symptoms.
This procedure helps determine whether a replacement battery is required or whether routine maintenance may first restore useful performance.

The most important rule: do not choose a new battery solely by the robot’s series number. Confirm the exact model, existing battery chemistry, nominal voltage, housing shape and contact arrangement.
Start by identifying the symptom pattern
| Symptom | Possible cause | First check |
|---|---|---|
| The robot charges only occasionally | Dirty or damaged charging contacts | Clean the robot and dock contacts and check their alignment. |
| Runtime has gradually decreased over several months | Loss of usable battery capacity | Charge fully and perform a timed runtime test. |
| The robot is noisier, slower or difficult to turn | Hair and debris around brushes or wheels | Clean the main brushes, side brush and front caster wheel. |
| The robot stops with an error | Charging, brush, sensor or another component fault | Record the error number and consult instructions for the exact model. |
| The problem begins immediately after battery replacement | Incorrect chemistry, voltage, contacts or installation | Compare the new battery with the old one and reinstall it correctly. |
Five checks before buying a replacement battery
Clean the charging contacts
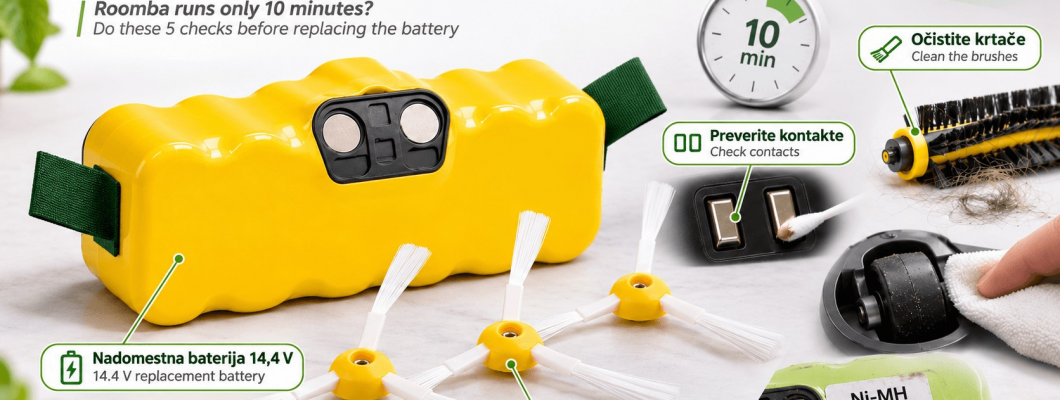
Disconnect the charging dock from the mains and wait for approximately one minute. Wipe the metal contacts on the robot and dock with a lightly dampened soft cloth or melamine foam. Do not use sandpaper, a metal brush or an aggressive cleaning product.
The contacts should be clean and evenly metallic. Green, copper-coloured, recessed or mechanically damaged contacts may indicate that replacing the battery alone will not solve the problem.
Remove hair from the brushes and front wheel
Hair, threads and fibres often wind around brush shafts and the front caster wheel. The drive and cleaning motors must then work harder and use more energy.
Remove the main brushes, clean their end caps or bearings, inspect the side brush and clear the front-wheel housing. Every component should rotate freely after reassembly.
Perform a timed hard-floor test
Fully charge the robot. Temporarily disconnect the dock, start a normal cleaning cycle on hard flooring and measure the time until the low-battery warning. A carpet test is less comparable because the drive and cleaning systems normally use more energy.
Official diagnostic guidance uses approximately 60 minutes as a reference for many 400–800 Series models. Individual 900 Series models use different batteries and reference runtimes, so compare the result with the exact model, not only its series number.
Record the exact model and old-battery data
Turn the robot over and locate its full model designation. Then inspect the existing battery label: Ni-MH or Li-ion chemistry, nominal voltage, housing shape and contact arrangement.
Different battery versions exist within the 500, 600, 700, 800 and 900 families. “900 Series” by itself does not confirm that a robot uses a 14.4V Ni-MH battery.
Only then select a compatible replacement battery
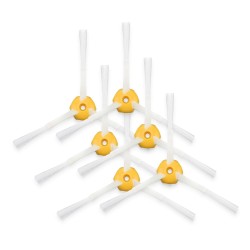
EA set 83077 contains a 14.4V Ni-MH battery with a 5000mAh capacity, four side brushes and four screws. It is intended for compatible older Roomba versions using the corresponding Ni-MH battery housing.
Nominal energy is approximately 72Wh, calculated as 14.4V × 5.0Ah. A higher stated capacity may provide longer runtime than a worn old battery, but runtime is not determined by the mAh value alone.
Why does 5000mAh not guarantee a fixed cleaning time?
Floor type
Carpets and high thresholds normally require more energy than smooth, hard flooring.
Brush condition
Hair around shafts and an obstructed airflow path increase the load on the motors.
Age of the appliance
Worn bearings, wheel modules or motors can increase power consumption.
Cleaning programme
Turning, searching for the dock and repeatedly covering dirty areas all affect total runtime.
Compatibility checklist
| Check | What must match | Why it matters |
|---|---|---|
| Exact robot model | Full designation on the underside of the appliance | Different battery versions may exist within one series. |
| Chemistry | Ni-MH versus Li-ion | Different chemistries must not be selected only by similar appearance. |
| Nominal voltage | 14.4V for this product | An incorrect voltage may cause failure or damage. |
| Housing and contacts | Shape, contact positions and correct installation direction | The battery must fit mechanically and electrically. |
| Warranty status | Appliance manufacturer’s conditions | Check the conditions before fitting a non-original part to a warranted robot. |
Basic replacement procedure
- Switch off the robot vacuum and place it on a soft, level surface.
- On applicable models, remove the side brush and bottom-cover screws.
- Lift away the cover and remove the old battery using its intended tabs.
- Compare the old and new batteries before placing the new one in the robot.
- Insert the new battery in the correct direction and check contact engagement.
- Refit the cover flush; it must not press on sensors or remain raised.
- Refit the side brush, place the robot on its dock and charge it.
Screw positions and quantities differ between models. If the procedure for your robot is different, follow its original instructions.
Maintenance after replacement
Every week
Clean the main and side brushes. Inspect them more frequently in homes with pets.
Approximately every two weeks
Remove hair and fibres from the front caster wheel and its housing.
Once a month
Clean the charging contacts on both the robot and charging dock.
During extended storage
Store the robot or battery in a dry place at normal room temperature and follow the instructions for its exact model.
Frequently asked questions
Does every short runtime prove that the battery is worn out?
No. Dirty contacts, hair around brushes, a blocked wheel, the charging dock or another fault may produce the same symptom. Perform basic diagnostics first.
Can I use a 5000mAh battery in every 500–900 Series model?
No. The exact model, Ni-MH chemistry, 14.4V voltage, housing shape and contacts must all match. The series number alone is insufficient.
Why are side brushes included?
A worn or deformed side brush is less effective at sweeping dirt from edges. The set allows this consumable component to be refreshed during battery replacement.
Must a Ni-MH battery be fully discharged before first use?
Do not deliberately deep-discharge it. Install the battery correctly, charge the robot according to its model instructions and then use it normally.
What if the robot still does not charge with the new battery?
Recheck the charging contacts, dock power, battery installation, chemistry and voltage. If the robot displays an error code, follow the procedure for that specific code.

Battery and consumable parts in one set
Set 83077 contains a 14.4V Ni-MH battery with a 5000mAh capacity, four side brushes and four mounting screws. It is intended for compatible Roomba versions with the corresponding battery chemistry, voltage, housing and contacts.
Restore useful runtime to your robot vacuum
Check the model designation and old-battery label. If your Roomba uses a compatible 14.4V Ni-MH battery, one set can replace both the battery and worn side brushes.
View the 14.4V/5000mAh battery Robot-vacuum batteries and parts